Categories and tags, and to a lesser extent, sub-pages, are different ways to organize your content for readers. Categories are a kind of ordering system based on the idea of topics: posts on different topics go into different categories. Tags, on the other hand, are more like relationships. They are more flexible and can cut across categories.
For example, you may have a post about your visit to a market in Germany. This would appear in the your Travel category, but might also be tagged with “Family”, “Food” or other terms that suggest whatever other things it is related to.
Generally speaking, maintaining organized categories and tags is paramount for readers.
What are Categories?
Categories are a way to organize your posts. In effect, they create a virtual “menu” of posts that helps readers navigate them. It helps to think of Categories as the “topics” of your posts. More information about them can be found on the WordPress Codex article on Post Categories.
How Do I Add a New Category?
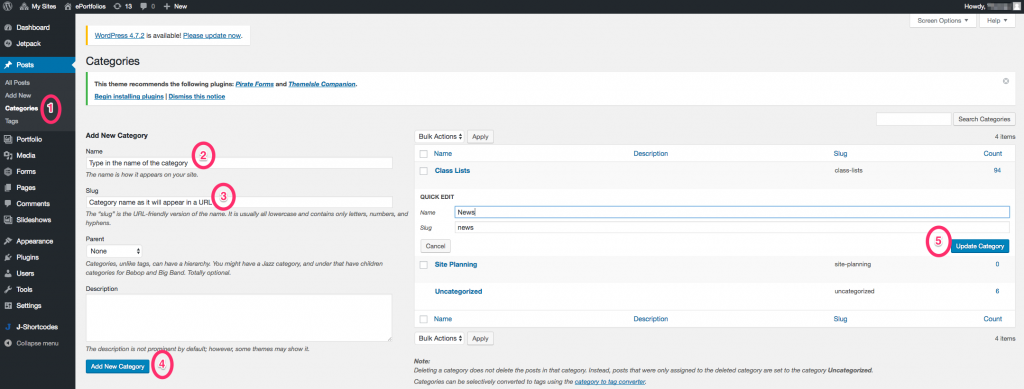
#1 – Click “Categories” under the Posts menu. This will open a new category page.
#2 – Type in the name of the category. This can be as descriptive, or as brief, as you choose.
#3 – Type in a “slug”. This is a URL-friendly version of the category name, and is usually shorter.
#4 – Click “Add New Category” after you’ve selected a parent (if necessary) and added an (optional) description.
#5 – Update the Category if you want to make changes later.
What are Tags?
Like categories, tags are another way to organize your posts. Bloggers typically use tags on larger sites with multiple contributors, so that posts can be related to each other across categories. More information about them can be found on the WordPress Codex article on Post Tags.
How Do I Add a New Tag?
Adding a new tag is similar to adding a new category.
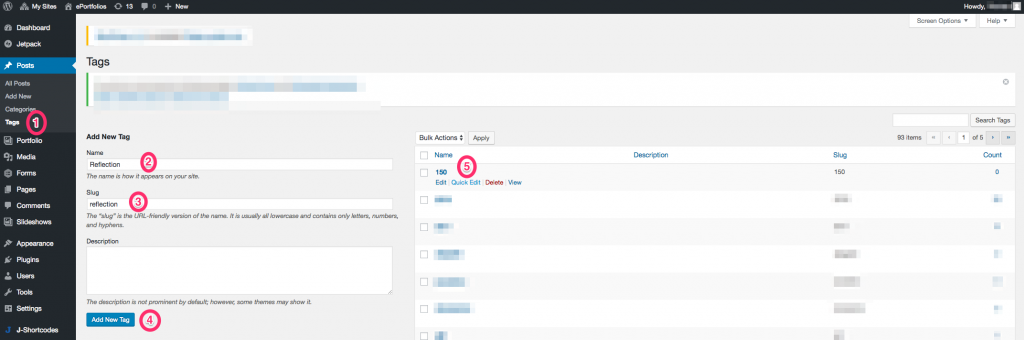
#1 – Click “Tags” under the Posts menu. This will open a new tag page.
#2 – Type in the name of the tag. This can be as descriptive, or as brief, as you choose.
#3 – Type in a “slug”. This is a URL-friendly version of the tag name, and is usually shorter.
#4 – Click “Add New Tag” after you’ve selected a parent (if necessary) and added an (optional) description.
#5 – Update the Tag by clicking the “QuickEdit” link, if you want to make changes later.